"Dragon's Lair: The fantasy adventure where you become a valiant
knight, on a quest to rescue the fair princess from the clutches of an
evil dragon. You control the actions of a daring adventurer, finding his
way through the castle of a dark wizard, who has enchanted it with
treacherous monsters and obstacles. In the mysterious caverns below the
castle, your odyssey continues against the awesome forces that oppose
your efforts to reach the Dragon's Lair. Lead on, adventurer. Your quest
awaits!". That quote will forever be etched upon your brain if you have ever played Dragon's Lair. That's the intro during attract mode. Dragon's Lair was released by Cinematronics in 1983, which was worked on by Don Bluth. The animator Don Bluth also worked for Disney creating classics such as The Secret of NIMH (1982), An American Tail (1986), The Land Before Time (1988), All Dogs Go to Heaven (1989), Rock-A-Doodle (1991). He worked on animating several other movies but will forever be know for his contribution to one of the most technologically amazing video games at the time.
Dragon's Lair is also one of only three video games (along with Pong and Pac-Man) in storage at the Smithsonian Institution in Washington, D.C.
Essentially Dragon's Lair is a cartoon that is played on a laser disc which you control Dirk's quest. The laser disc player jumps from scene to scene depending on selecting the correct move. You control Dirk with a wico joystick maneuvering up, down, left or right, as well as a sword button. The controls seem easy yet the game is certainly frustrating if your unfamiliar with the game play. You start out with 5 Dirks which seems like a decent amount until you realize how quickly and easily if your timing isn't perfect you can perish before you can blink. This game to my knowledge at the time was one of the first games that cost .50 cents, In 1983 that was a big deal. Dragon's Lair's are getting tougher to find especially running original hardware such as a laser disc / laser disc player. I found one that wasn't restored but I needed to ship the game. I was scared and reluctant to do so because at first the seller wasn't providing me with all of the pictures I needed to know if they game was complete. The game was claimed to be complete but also stated arcade technician needed, game doesn't work. I didn't mind at this point I'm confident with time I can fix just about any machine so I took the chance and shipped it almost blind.
When I got the machine I turned it on and the fan vibrated the entire machine and was really loud, I then simply disconnected. The good thing was that the machine looked essentially "complete"as far as the hardware. The score board lit up, monitor had a vertical collapse issue. At this point I decided to replace the existing LV1000 laser disc player with an upgraded Pioneer LV4400. Before you can upgrade the laser disc player you need to make sure you have Shaun Wood's "Merlin" board installed.
Upgraded replacement Pioneer LV4400
I tested the Pioneer LV4400 hooked right up to my LCD just to be able to test the player while I was waiting for my Merlin board from Shaun Wood. The Laser Disc player needs to have a baud rate of 4800 in order for it to be compatible with the Merlin card.
Testing LV4400 on my LCD TV
Dragon's Lair Power Supply
Shaun Wood's Merlin Board
Above you can see the original card on the left with the ribbon disconnected, on the right it's replaced with Shaun Woods Merlin. To obtain a Merlin board I highly recommend you talking to Shaun first to see exactly what your needs are http://wood1st.com/LaserCon/Merlin/index.htm . I can't say enough good things about Shaun Wood without him my Dragon's Lair along with many others wouldn't be using original hardware so I tip my hat. Shaun also guided me along with any questions about Dragon's Lair in general. A wealth of knowledge exists on his site the DLP Forums also known as the http://www.dragons-lair-project.com/ .
Cosmetically the game was completely missing side art but the original vinyl was in decent shape, I used armor all to clean the side of the cabinet. One thing I can recommend is that make sure it's completely dry before trying to apply side art or you will have a problem with the adhesion of the side art to the cabinet. The game was cleaning up nicely.
Side Art Installed
I originally ordered parts from Anthony at quarterarcade.com for the side art (as shown above with the premask, after installed shots), marquee, as well as the control panel overlay.
My original control panel overlay was missing a chunk of Dirk's legs. Not only was it missing but it was dirty and faded and needed to be replaced. Now to the common person most would see the below replacement suitable but I'm extremely picky when it comes to certain things about my restorations. Anthony's artwork although officially licensed was a complete abomination.
It's rather apparent that quarterarcades artwork doesn't compare to the original and the quality wasn't what I expected. Anthony on his website stated "Reproduction Dragon's Lair upright arcade game control panel overlay.
CPO is professionally printed on 10 mil adhesive backed lexan, 4 color
process, color matched and die cut. This is the only Dragon's Lair CPO
licensed in the world! 100% money back guaranteed!". Well I wasn't happy so I talked to Anthony and he basically said he was aware of the issue which effects all of his cpo's. I kept the side art since that looked fine and was on the hunt for a NOS also known as New Old Stock CPO from 1983. What are the chances I was going to actually track one down ? I saw that someone on KLOV (Killer List of Video Games) posted one was for sale but I wasn't fast enough and it was quickly sold. Although it had delamination issues the colors were sharp and most of the issues were on the bottom of the control panel which wouldn't of been noticed. Since I pointed those issues out to Anthony he actually now changed some text on his website to reflect it, he now says "Please note that we have done our best
with this reproduction, but have had some people indicate they were not
completely happy with the quality of the artwork printing on this
particular overlay. Because of the complexity of the original artwork,
this was a very difficult piece to recreate (it cannot be redrawn
easily, like other pieces we carry). We did borrow a NOS piece, had it
scanned and recreated and this is what our printer was able to come up
with. Please take a look at the pictures before purchasing.". Anthony kindly accepted my return and I actually needed other parts so it worked out fine.
I got a message from the person who bought the NOS overlay on KLOV & said they were just using it as a back up and I was eligible to purchase it if I wanted it! At this point I was able to get Dirk's legs back and have an original overlay from 1983 that looked sharp. I started to take apart the control panel. To reiterate on prior posts once again I used a wall paper steaming machine to get off the chunks missing control panel overlay. I then began to proceed to sand down the control panel making sure no vintage glue remained. I probably should of waited until the NOS overlay actually got to my house but I wanted to start the process. Luckily It was in better shape than I expected it to be.
Control Panel sanded down getting ready for NOS CPO!
NOS CPO installed
At this point I used plastic clamps overnight to hold the NOS CPO in place. The following morning I then proceeded to clean the original wico shaft in the chuck of my drill, installed new switches, sanded and painted various bolts. Oh yeah for whatever reason this was the first game of dozens that I've worked on that the leaf buttons / leaf switch holders and pal nuts decided to not budge, I ended up just using my sawzall to fix that. Control Panel came out looking amazing! I'm really glad I decided to get an original overlay for this game.
NOS CPO and hardware reinstalled
Also many Dragon's Lair's from the factory had really what I consider low side art. I'm aware of placement was generally much lower however I hate the side art sitting that low so what did I do, not only did I place it higher which looks much better, but I got confirmation from Shaun Wood who used to work on the assembly line installing the side art in 1983 when he was 18. He basically said the side art height actually varied from cabinet to cabinet and that most of them were installed by him and his other 18 year old friends at the time. While I didn't need that confirmation it felt good to hear that come from someone who originally help produce these in 1983.
Raised Cinematronics coin door logo
Dragon's Lair coin door parts
Resprayed Dragon's Lair coin door
Cinematronics raised lettering logo cleaned up
Above you can see that the original Cinematronics coin door which had the more desired "raised lettering" was still present and in decent shape but needed to be revitalized. I took the coin door apart, removed original paint, hand sanded down the Cinematronics logo, repainted the coin door using my favorite black textured plastic paint new cam lock installed.
Dragon's Lair Scoreboard
The game is obviously unique in the fact that your controlling a cartoon on a laser disc especially for the year 1983 but also this is one of the only video games I can think of that has a score board that's not built into the CRT. The scoreboard displays your score, lives player 2 score, player 2 lives, as well as credits. Not only was my original scoreboard functioning it was in cosmetically good condition. I only lightly used some Novus plastic polish cleaner on it, which looks fine.
Behind Speakers & Scoreboard
Testing TV monitor outside of cabinet
The original Wells Gardner monitor inside the cabinet has a unique NTSC card that has a BNC connector on it that converts the Laser Disc signal to be compatible with arcade monitors. Even though the Pioneer LV4400 Laser Disc player has both BNC as well as Composite out majority of CRT arcade monitors don't have the input without using an adapter. As you can see in the above photo I'm testing the game using a regular TV which has those composite inputs therefore no adapters are needed. Some people who own Dragon's Lair take TV's and simply decase them , have them attached to the existing frame on the inside. I wanted to keep it's original Wells Gardner k4900 monitor so I decided to send out the chassis and NTSC card to fix the vertical collapse. I probably could of fixed it on my own as I'm familiar with cap kits but this particular monitor isn't as easy to replace so I sent it out to a guy that's highly recommended among the arcade community http://thearcadebuffett.com/ . Should you need to get your chassis replaced I suggest contacting him. He actually posts a video of each monitor he repairs on YouTube explaining what he fixed showing the monitor running.
Wells Gardner CRT K4900 NTSC Card
When I unplugged the test TV, I wasn't getting any audio from the game speakers, even though they were properly connected. As it turns out that during attract mode I had set through the dip switch settings the audio to come on once every eight attract scenes. Also you can actually adjust both the background music, as well as the narration serpately with these two knobs as seen in this photo below (The knobs are located to the left inside the coin door) At first I thought they were fuse holders! I'm so used to the volume pots being on the actual PCB's I forgot to check other locations:
Volume Control Background Music & Narration
I also completely replaced the marquee light fixture, it was dead so rather than take a chance wasting time and money the cost of an entire fixture that comes with a lamp is close to a single florescent lamp. Once the monitor chassis and NTSC card was reinstalled and after I hard wired in the LV4400 laser disc player, my Dragon's Lair was ready to play. Below is a video of my Dragon's Lair machine during the attract mode.
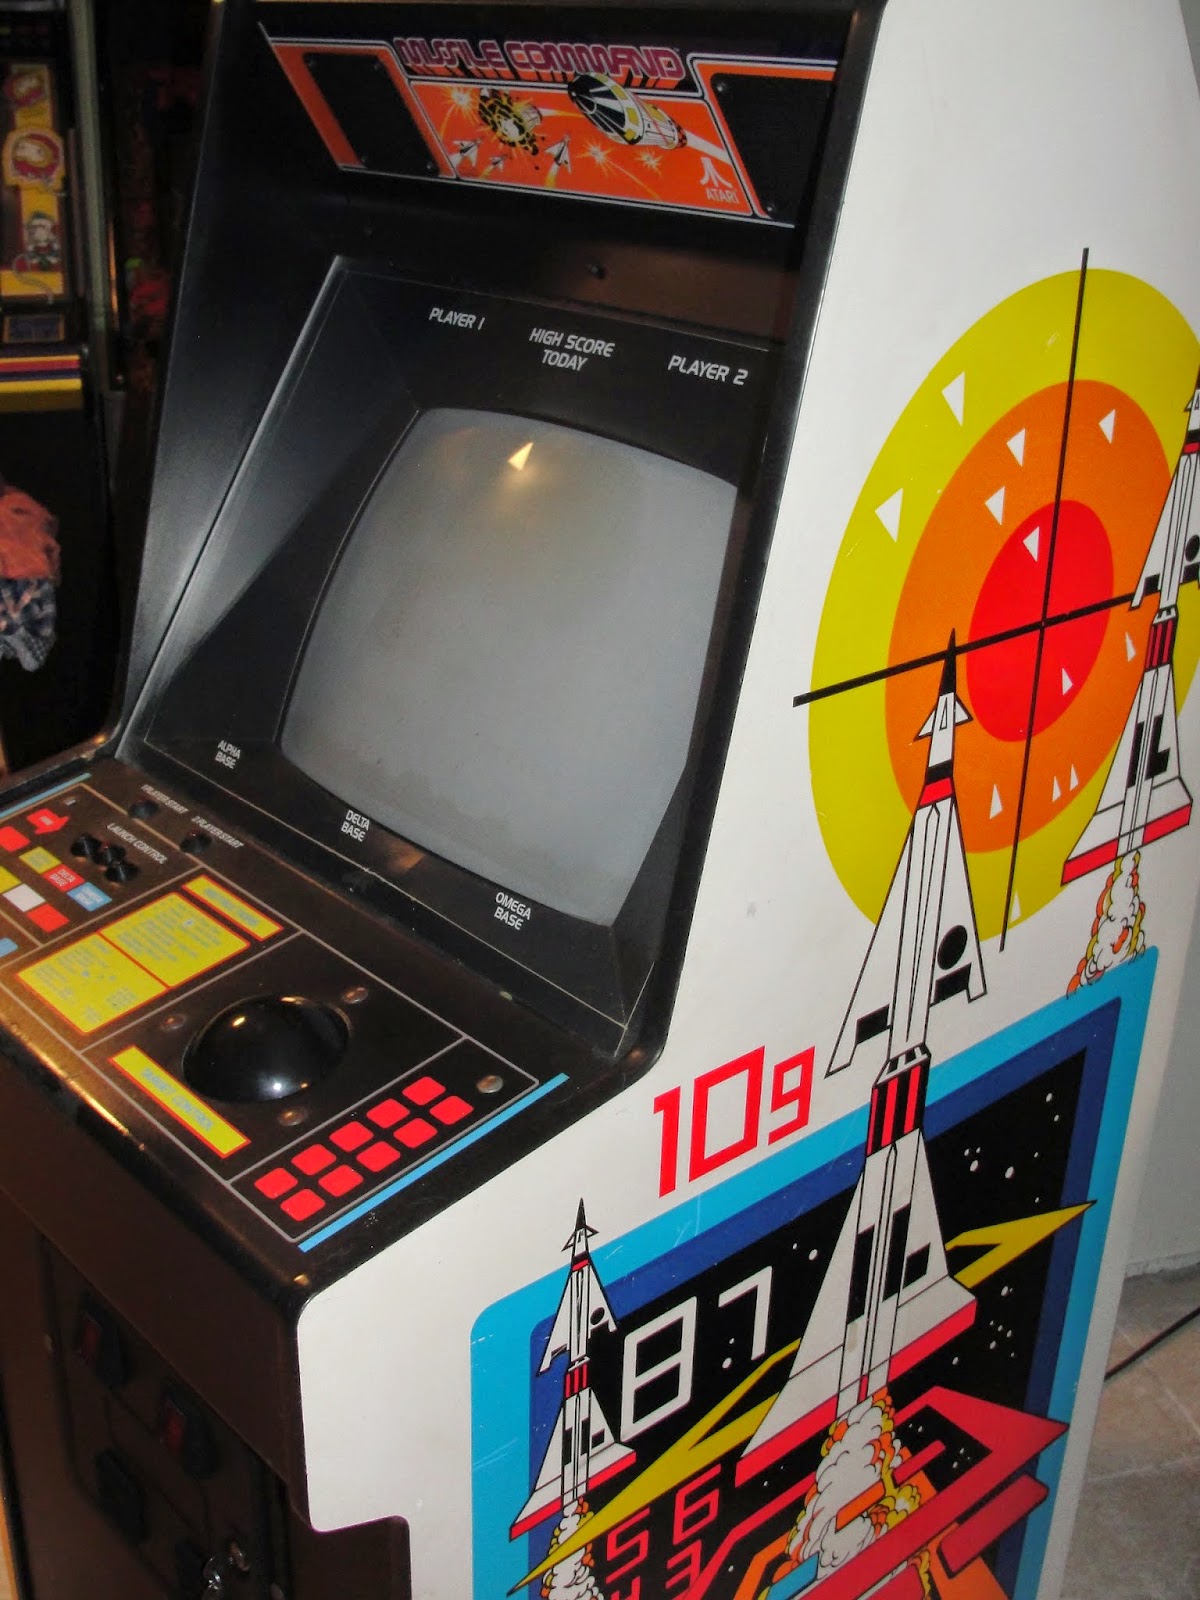
Atari's Missile Command is a simple game with ultimately the object is to defend your cities. The game consisted of a rather large 4.5'' black trackball with three Atari cone buttons which would launch your missiles. The game had great side art in addition to a cool looking control panel that pulls you right into the theme. I drove upstate roughly 4hrs each way to pick up this game from a craigslist ad. Missile Commands are certainly recognized as one of the better games from the golden age of the arcades. To this day a ton of ports and various digital versions of the game exists throughout consoles and mobile devices. The game was advertised as working, which upon pick up it was. However the game needed some minor cosmetic and preventative maintenance.
One of the first things to address was the trackball. The original ball was worn and dull so I bought a new ball also the rollers and bearings were all replaced to give the trackball a nice smooth roll.
Old Vs. New Missile Command Trackballs
Here in my hand you can see a comparison to the old worn rollers in comparison to the new installed smooth rollers:
Although the game was functioning I decided to do a little preventative maintenance & recap the ARII which regulates the power and audio. I ordered the kit from Bob Roberts website along with a few other items that I needed. The caps are all axial capacitors which have leads from both ends. It's also advisable at this point to resolder the existing molex connectors on the ARII.
Bob Roberts ARII Rebuild Kit
Installed new caps on the ARII
After everything was checked over several times It was time to break out my fluke multimeter.
I was seeing a drop in voltage from the ARII to the main board, I looked at my wire harness and edge connector I don't think it was making a good connection so I decided to pull each pin as tedious as that sounds and hand sand each one to make a better contact. Sure enough after sanding all of the pins I was getting the proper voltage that I needed. It's probably advisable to recrimp with all new pins but that method seemed to work for me.
This is one of the few games that I can think of that the speakers are built right into the marquee. I pulled off various parts and cleaned, sanded, painted etc..
Rom Issue
Once I fired up the game I was unfortunately greeted to what looked like the blue screen of death in windows. I tossed the game into test mode and it said I had a bad rom with it's respective location.
Taking a break from the restoration for a moment ... Atari's Missile Command was found also seen in the TV show Chuck, along with one of my favorite movies Terminator 2: Judgement Day. On an episode of Chuck which is titled "Chuck Versus Tom Sawyer", Chuck needs to play Missile Command in order to avoid a real nuclear disaster apparently to the Rush song Tom Sawyer.
Chuck Playing Missile Command
Missile Command can also be seen in the movie Terminator 2: Judgement Day at the Galleria mall scene. Robert Patrick's character the T-1000 is looking for John Connor aka Edward Furlong, and while he's playing Missile Command, the T-1000 asks his friend Danny Cooksey (also known as Budnick from Salute Your Shorts show) if he knows where he can be found . This is a great scene with tons of recognizable machines in the arcade at the mall leading up to a dual between the Terminator ( Arnold Schwarzenegger ) and the T-1000. As a side note I'm excited for the 5th Terminator movie to debut July 1st of 2015, I'm a huge fan of the Terminator franchise.
John Connor Playing Missile Command
Getting back on track to the restoration Reburned all 6 roms just incase and sure enough it fired right up. I'm
not sure if the game went into shock after I recapped the ARII but
everything seems fine now. I also cleaned up various metal parts sanding, painting etc.. The side art was in nice original condition so I didn't really mess with it too much other than doing a few minor touch ups.
The coin door needed some attention, I decided to respray the coin door using black textured plastic. I used the same on the marquee metal parts. The control panel wasn't bad but some of the Atari cone buttons needed to be replaced. A long time ago they were reproduced, I was lucky to get them at the time because those are getting tougher to find.
Before Cleaning Coin Door
After Cleaning Coin Door
The monitor without a doubt needs a cap kit but I have yet to do that. Missile Command Is one of my oldest games in my collection It's amazing that the inside has parts on it that say 1979 even though the game came out in 1980 and they still work which is incredible. I used Novus plastic cleaner on the bezel to get out minor scratches, game still has it's original black cardboard behind the plexi. Below is a picture of the encoder wheel with it dated 1979.
Missile Command Original 1979 Track Ball Encoder
Game came out great and is a blast to play. I'm terrible at this game but it's really fun. Below is a picture of the finished game.
In 1981 Konami produced Frogger which was distributed by Sega / Gremlin. The game was simple you controlled a frog with the joystick moving up, down, left, or right. The game requires you to get your frog safely to the other side while avoiding cars, trucks, snakes, alligators, otters, disappearing lily pads. The game is all about timing and being patient. Although if you safely make it to the frogs home on the other side quickly you will be rewarded bonus points. Other ways to rack up bonus points is by rescuing your frog friend or eating a fly. Speaking of timing and patients for whatever reason these games don't seem to pop up as often as you would think. I was lucky because I went on a road trip and grabbed two games in one shot with one being the Frogger.
The game was completely dead when I picked it up, I knew I was going to need to invest some time and money into getting things hopping again. The cabinet was beat so I wanted to completely strip it down remove virtually all parts and sand / bondo the cabinet.
The original cabinet had a wood grain look, so I wanted to achieve this and keep it's cheesy but classic look. I looked into using a laminate and a vinyl, I choose vinyl since it was available at a very cost effective 24 bucks. I used a roll from home depot it was called "Con-Tact Creative Covering". This stuff was very easy to use and an exacto blade made things a breeze.
.
I basically gutted the game and disassembled the existing wiring, I ended up just using a new switching power supply unit along with a Jamma harness and I used a Konami to Jamma Adapter on the original PCB. To my surprise my original PCB was working but I just ended up ordering a back up off ebay.
The control panel was in decent shape but I decided to replace the overlay. I stripped the original overlay with my wallpaper steamer (which works great you can use it indoors no chemicals), I then proceeded to spray the metal control panel to prevent future rust. Once that was done I slapped on the new control panel overlay, along with I threw the joystick into the chuck of my drill to shine it up and take off the 30+ year old crud off. Once I rewired and put back together it was looking much better.
Before
After
Cosmetically I was coasting along however the original CRT was dead. I decided to recap the G07 monitor. I'm not sure if anyone else is familiar with removing a Frogger monitor but it's not fun, the monitor was bolted through the wood frame which had various safety metal / wood blocks that needed to be removed along with the plastic and cardboard bezel needed to be removed. While I had the bezel off I decided to clean it along with using novus on the plastic bezel to buff out any minor scratches.
Old caps on top New caps on bottom
Recapping a monitor is tedious & time consuming and flat out nerve-racking (at least to me) for anyone that's done a cap-kit before knows what I'm talking about. Essentially overtime the capacitors dry out and need to be replaced. In order to replace them you need to know the value for each one, they are however often sold as kits. The monitor needs to first be safely discharged along with following a map of where each cap goes. Along with replacing the caps I also replaced the fly back, voltage regulator, hot, width coil.
I don't know what possessed me to do so but I guess I wanted to have my Frogger look as much as the original flyer as possible so I decided to order side art for it, why I don't know considering it gets lost when wedged between two other games in a row. I also painted the speaker grill, cleaned up the marquee, sanded down the coin mechs, replaced the marquee light with a new one, new T-molding. All and all the game came out nice and clean.
I'm not sure if it was Konami or George Costanza which made Frogger more popular. "The Frogger" is the 174th episode of the NBC sitcom Seinfeld. Without giving the episode away essentially George tries to acquire an old Frogger machine on which he's held the top score since high school. With the Perfect combination of Mountain Dew and mozzarella GLC high score stood the test of time after all these years.


.JPG)


 I got a message from the person who bought the NOS overlay on KLOV & said they were just using it as a back up and I was eligible to purchase it if I wanted it! At this point I was able to get Dirk's legs back and have an original overlay from 1983 that looked sharp. I started to take apart the control panel. To reiterate on prior posts once again I used a wall paper steaming machine to get off the chunks missing control panel overlay. I then began to proceed to sand down the control panel making sure no vintage glue remained. I probably should of waited until the NOS overlay actually got to my house but I wanted to start the process. Luckily It was in better shape than I expected it to be.