
The first game that I'm going to talk about restoring / building is Capcom's Gun Smoke. Originally this machine started it's life as a Taito Alpine Ski, which was then at some point later converted to a Mr. Do. My intentions were to create a Gun.Smoke conversion, since capcom never officially released this video game as a dedicated cabinet in the US, rather a "conversion kit".
To me this game is significant because I'm currently the world record holder in MAME for Gun.Smoke, you can find out all video game records which are held by
http://www.twingalaxies.com/ .
When I first got the machine it needed alot of work! For starters the control panel had an unnecessary hole in the metal, along with a bad monitor, and a rough paint job. This was my first Non-MAME video game machine so I found out alot along the way during my restoration.
Here is the initial picture before my restoration really got underway:

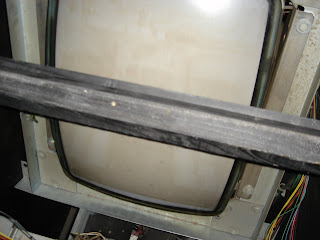
First I removed the bad monitor, which was not secure (maybe during transporting), but it literally fell down half way, luckily the rail was able to support it just enough before plummiting to it's doom.
 I ended up ordering a brand new CRT Provision monitor from http://www.happ.com/ just in the nick of time! This is because unfortunately they are no longer selling them! Only LCD's in the 19'' size. Many companies have stopped the production of CRT's due to the popularity of LCD's. Not only Happ, but many other arcade part companies have stopped production of CRT's.
Moving along with the restoration I took the control panel off & thought about where I wanted to drill the 3 buttons on each side since it's an ambidextrous set up. :


I was thinking about making an arc for the buttons, or perhaps just a straight line, in the end I decided to stay with an arc, because naturally that's how your fingers are. I started to drill using a 1 3/8'' hole saw attached to my drill.
 Once the buttons were fully drilled through the control panel, I then started to procede to take off the old and very stubborn control panel overlay. For future tips to anyone removing an old CPO *Control Panel Overlay, I would recommend using a heat gun, or hair dryer & especially paint stripper.


I wanted to get the control panel down to the bare metal, so I then bought a drill attachment to help with the process (again, if you wanted to use paint thinner you could avoid this step, this is very time consuming but no chemicals are used). 


 I was able to score a nice deal on the PCB (Printed Circuit Board) from a KLOV (Killer List of video games) member. This game actually has a few variations of the board set, mainly 2 in the US. You have US Rom Set 1 (Which is the board I own) in this version on the bottom of the title screen it shows Romstar 1985 along with Capcom 1985, high score is set at 100,000. The US Set 2 is slightly different with the High Score set to 110,000 instead of 100,000 and on the bottom of the title screen it displays Romstar 1986 Capcom 1985. The main difference during game play is that levels 3, & 6 are swapped on the US Set 2. The reason why they did this was due to people complained it was too difficult. The Japanese board set for this game allows the user to enter up to 8 character letters after a highscore is achieved instead of the traditional 3 initials on the US boards.
 This particular game is considered to be a "Capcom Classic". I wanted to wire the cabinet using a capcom classic adaptor which I purchased from http://www.jammaboards.com/ . This adaptor allows you to use the correct pinout with a JAMMA (Japan Amusement Machinery Manufacturers Association) harness. This adaptor also works with the following other games:
- The Legendary Soldiers
- Commando
- Exed Eyes
- Ghost n' Goblins
- Legendary Wings
- Section Z
- Space Invasion
- Trojan
 I got the JAMMA wire loom from an ebay member which had .187 female quick disconnects. This was all color coded, and a chart was provided to show the correct output.
 The power Supply
 These are the video cables from the JAMMA Loom(Red,Green,Blue,White sync,Yellow sync,Black/ground)

 I finally fired up the monitor for the first time, and sadly saw mainly red wavy lines. I then twisted both the yellow, and the white sync wires together and sure enough the picture came on, and was extremely crisp.

 I wanted the game (and all of my games) to accept quarters so it would give the player a more acurate feel of an arcade. Hooking up the coin mech's were pretty easy, but the game was missing one so I needed to order a new one.
 The original game kit contained a piece of plexi overlay for the control panel to help protect the artwork underneath, so I got a piece of plexi and drilled it accordingly. I also filled in the bad hole on the left side with bondo.
 Overall the cabinet was in solid condition with no water damage, but was in need of a paint job. I took the cabinet apart and first started on the front door area where the coin door is.


 The wood from the front door was nicked and scratched pretty bad before sanding. During sanding it revealed the original cabinets artwork underneath (Alpine Ski). After the surface was smooth enough I added spray primer. Once the spray primer was dryed I added the black paint. The end result on the front coin door came out pretty solid.

I was lucky enough to track down the original control panel sticker sheet for the game from an ebay user. They were however reproduced recently by Jeff at
Rotheblog. The control panel overlay I ordered from Scott at
Mame_Marquees . I have NOS (New Old Stock) Generic Romstar overlays, but I did not have one in brown, and that was the color I wanted to go with. I was sent the leaf buttons, and an original 8-way Wico joystick from a member on
BYOAC . The member on BYOAC was kind enough to send me those parts for FREE! I have since upgraded them using a new Wico shaft, and new leaf buttons which was ordered from
Bob Roberts .

With everything in place it was time to test the game out! Oh no my "fire left" was not working. As it turns out the "capcom classic" adaptor needed to be moddified to suit Gun.Smoke's 3 button configuration. All of the other capcom classic games have 2-button set up. So the adaptor needed to have a little bit of soddering done (black wires).


The cabinet was finished off with the NOS Sideart set one piece I luckily found on ebay, and the other I purchased from Anthony at Quarter Arcade. I'm very happy with the end result.


