Burger Time was made by Data East which was distributed by Bally / Midway in the US in 1982. The game is another maze type game while avoiding enemies and forming burgers as you walk across the buns, meat, tomatoes, lettuce etc. Throughout the game your character "Peter Pepper" is being chased by hot dogs, eggs, & pickle character enemies. You have various point potential opportunities by trying to group the enemies together and having a piece of the hamburger either crush them or have them walk across the hamburger pieces as you are dropping them. Peter Pepper you might notice walks around with an "H" on his chefs hat because the games original title was supposed to be "Hamburger". Peter Pepper does have the ability to mobilize the enemies brifely by using his pepper spray, but use them wisely as you are only allocated a certain amount. You will be able to get replenishment peppers as you play various levels. To advance to the next screen simply complete forming all of the burgers on the screen.
When I first picked up my cabinet it was in mediocre condition at best. While It's tough to tell from the above photos, the BurgerTime cabinet had various scratches, faded artwork, some minor planking, as well as the game was completely dead when I picked it up. Oh yeah the cabinet also had no CRT monitor, a bad control panel overlay, a bad power supply, faded t-molding, no locks, drilled lock bar holes to mention a few. The good news was that overall the cabinet was structurally pretty solid without any water damage. Also the cabinet had all of the original wiring for the most part intact, this cabinet was always a BurgerTime and never was converted. Probably one of the most unique features of the BurgerTime cabinet is the wood on top forms the chefs (Peter Pepper's) hat. I think cosmetically it's one of the more iconic, and eye catching cabinets that is cleverly done just right.
First I started with the coin door which was rusty, scratched, and very dirty as most midway coin doors are before a restoration. Especially being that this game sat on location for years. I disassembled cleaned, sanded, primed and painted the coin door as well as added new cabinet locks. Above you can see the various stages of the coin door restoration taking place. I might even redo the coin door again in "textured plastic" this one I just used a flat black, while it looks fine it can be improved. Below is a picture of the completed coin door with the flat black paint, and before I replaced the barrel lock:
The next challenge was to tackle the cabinet. First I started to sand away the old existing artwork. I used my Dewalt 2 1/4'' palm sander, which works great but it's just a tedious process. I would recommend probably using either an 80 grit or even possibly go as low as a 60 grit. Or just use what ever method works best for you. Once you get it down to the bare wood, your going to want to fill in any holes, cracks or wood issues with Bondo. You really want to stay away from wood filler as it sometimes does shrink over time.
Once I filled in all of the nicks, dents, and lock bar holes from when the game sat on location I was ready to paint. I used the main mustard color with a Home Depot color called "Yam" in case anyone needed the paint code. This was a very almost Identical match to the original. I needed to wait for the stencils to come because they had a long delay due to the fact that Rich at Thisoldgame.com was busy with other projects. The delay gave me some time to work on other cosmetic / and mechanical issues on the cabinet.
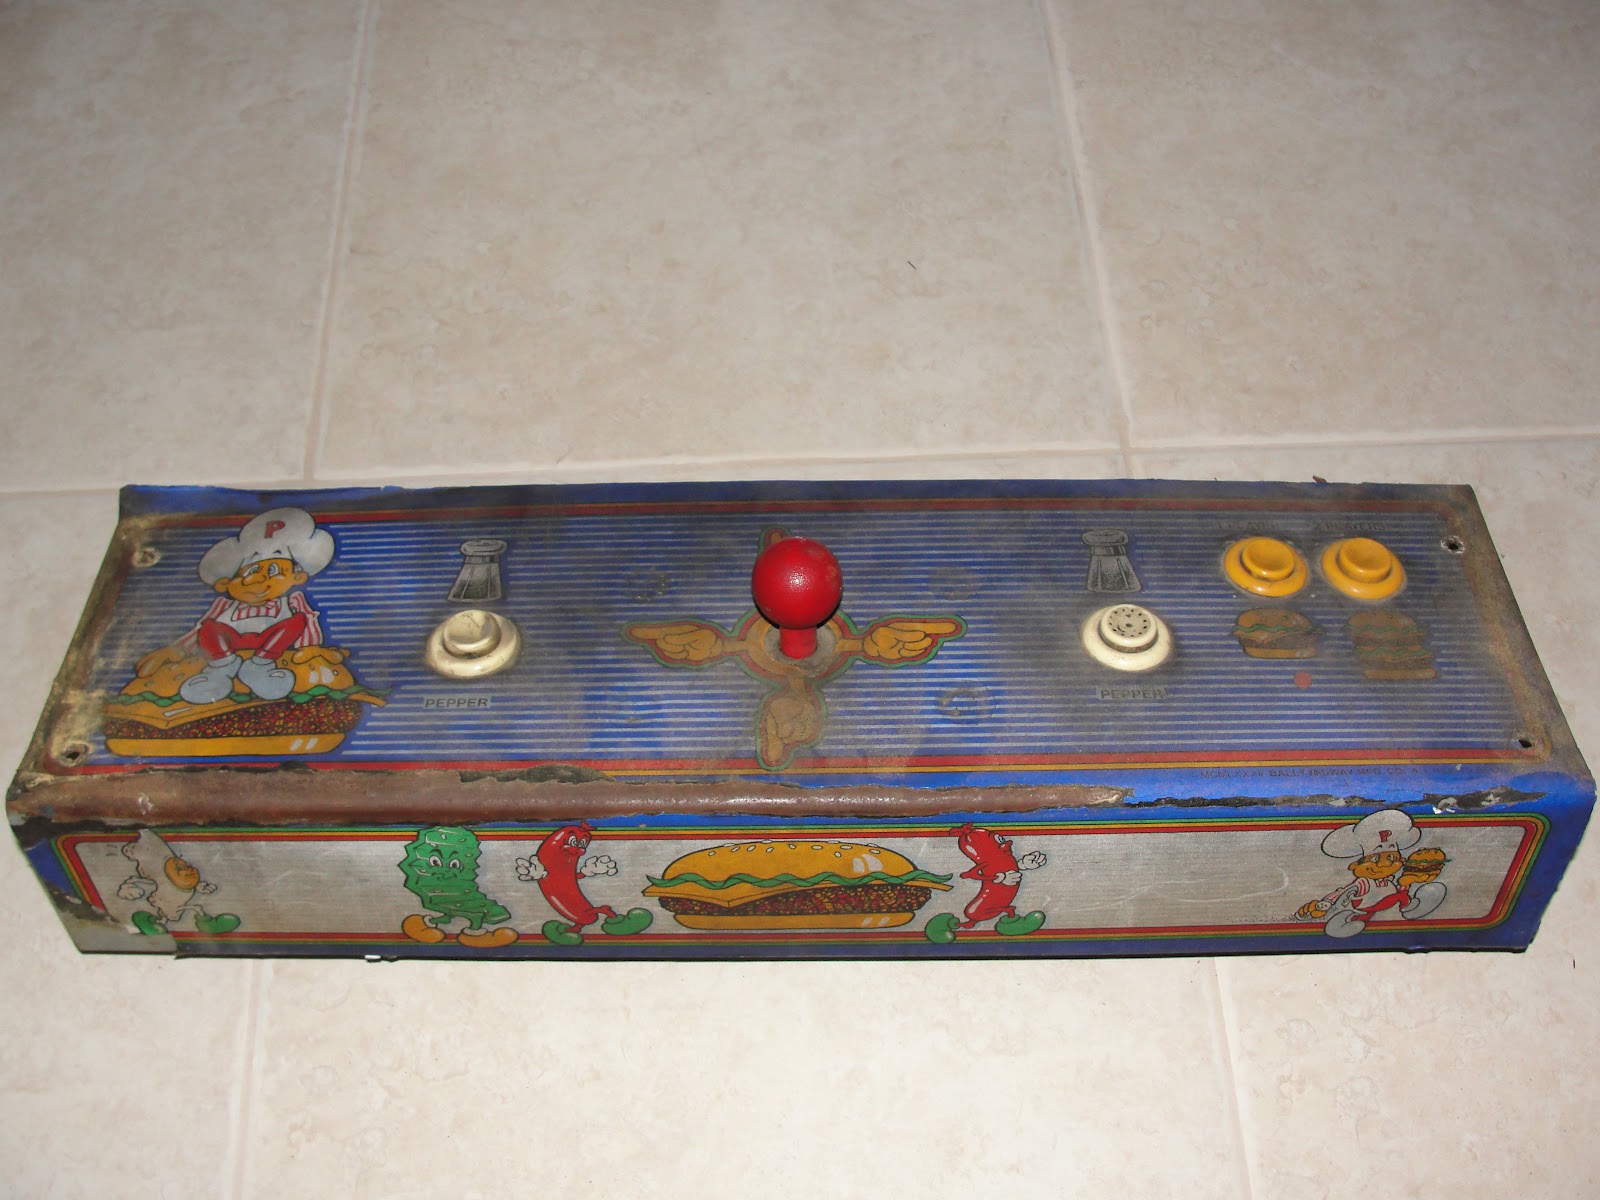
The first thing I decided to work on while waiting on the stencils to come in was the control panel. The original control panel overlay was peeling, dirty, along with the control panel had rust etc. Below you can see pictures of the CPO (Control Panel Overlay) before:
I ended up using a wall paper steamer for the first time to
remove the older control panel overlay. This is actually great because
you don't need to use harmful chemicals, sure it's not as fast but you
can certainly even do it inside without worrying about toxic flesh
melting paint stripper. Once the control panel was stripped of all parts
including the CPO, I sanded, and used bondo, as well as painted the
panel to prevent future rust from forming. I bought the New Silk
Screened CPO from "Backtothearcade.com" which was actually made by Rich
at Thisoldgame.com.
New Silk Screened Control Panel Overlay
During Installation
Control Panel Reassembled
The control panel was just about finished with one detail missing the
"Pepper Buttons". I ordered my button stencils from gamestencils.com.
Brian who runs the website gamestencils.com sometimes offers the buttons
already completed but I figured I would try them on my own. I ordered
several sets of them as back-ups, and of course in case I made a mistake. I found the best method to applying the stencil to the button was flip the button upside down, and than simply use your fingers to smooth out the stencil. Once the stencil is applied I used painters tape around the button to prevent any paint from going where I didn't want it to go. I used a piece of Styrofoam to help keep the buttons in place while spraying. Once you take the stencil off you will have a nice pepper button. After the stencil fully dries probably best to wait several hours if not the next day a good Idea would be to clear coat them to prevent button wear in the future .
Completed button
The next thing I got in the mail from Arcadeshop.com was the switching power supply kit. The original power supply is over 30 years, thus a new switching supply kit is easier to just drop into the game and likely more reliable than an older linear power supply. The only major complaint I have about Arcade Shops kit is that the adapter is not secure on the power supply, they should of had the adapter completely slide through the terminal screws rather than having it sit on the very edge of the adapter. I think this power supply kit also works with the following games: Mappy, Super Pac-Man, Jr. Pac-Man, Gorf, Wizard Of Wor, & Bump N' Jump.
Arcade Shop BurgerTime Power Supply Kit
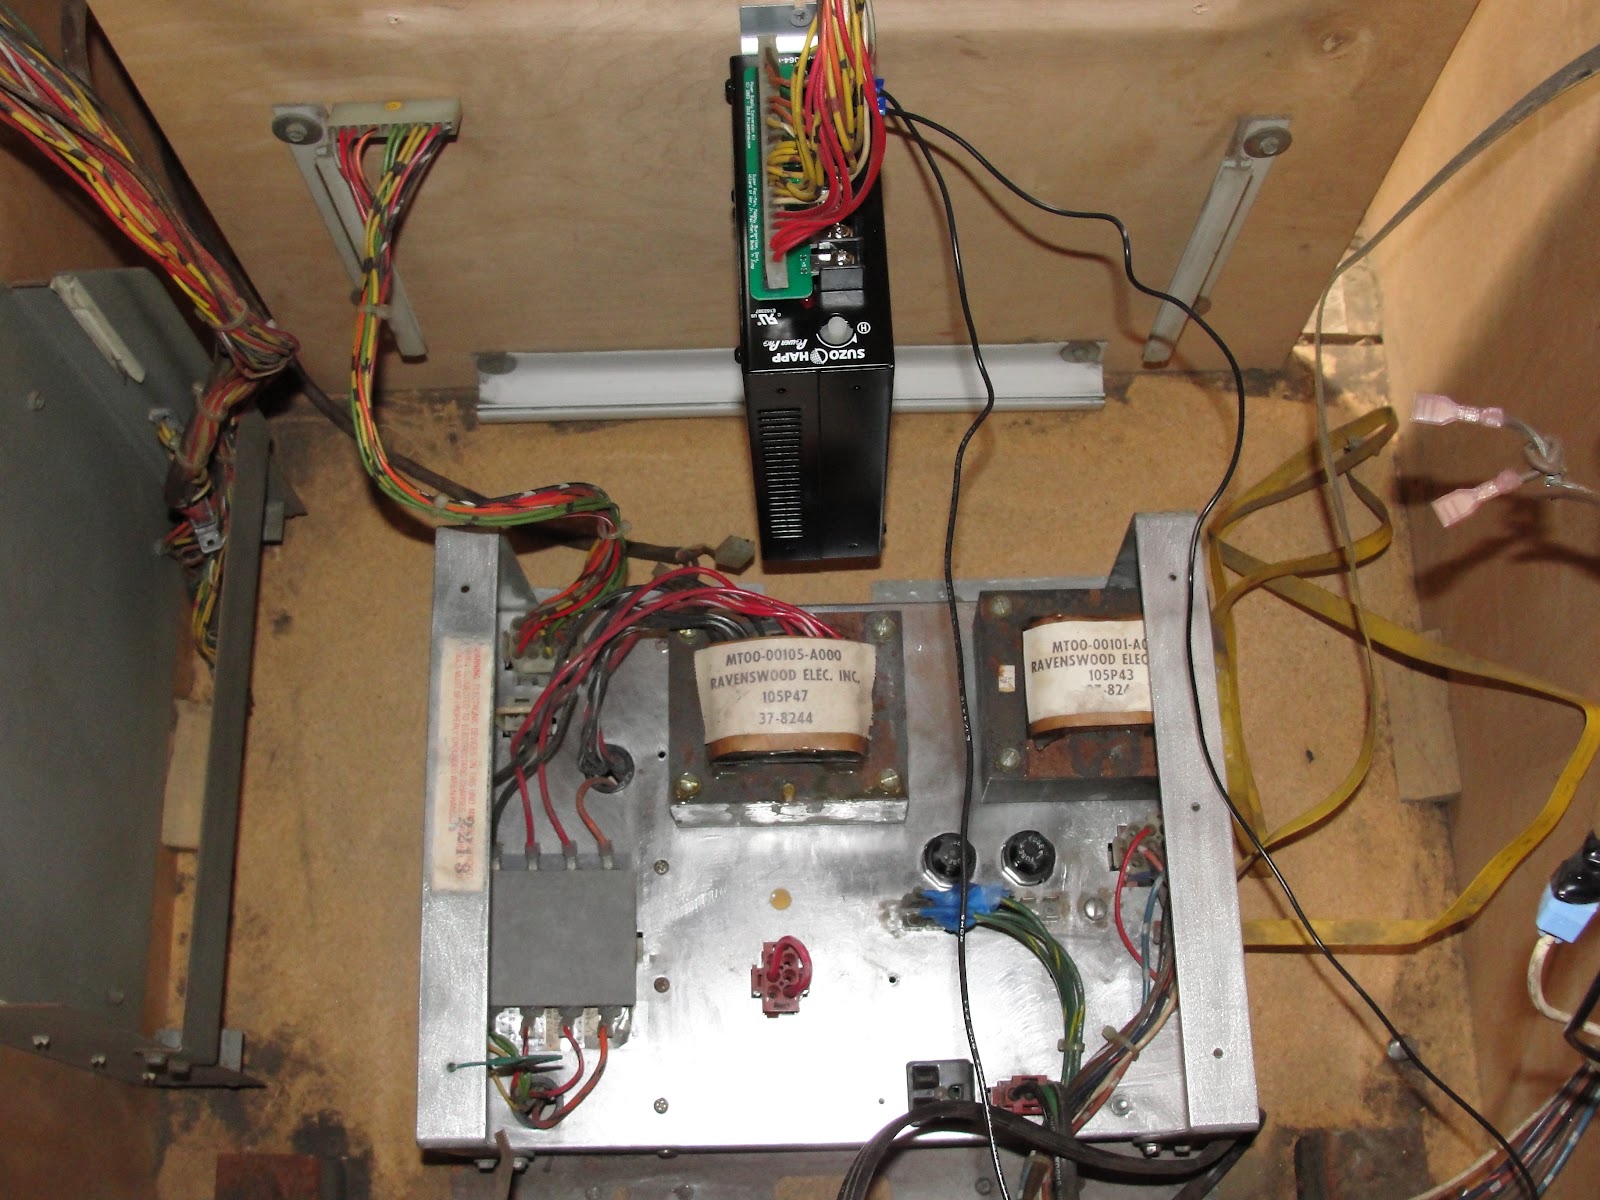
The next thing I did was I cleaned the inside of the cabinet, in addition to sanding down both the inside of the cabinet as well as the "brief case" style original transformer / power brick. Also my interlock switch was completely not connected, this could be dangerous if your working on a game and forget to shut it off, so I reconnected the wires accordingly.
Inside of cabinet
Interlock Switch
At this point in time I was still without a CRT Monitor to test the game, but I wanted to see if my PCB (Printed Circuit Board) was working. The game was now essentially wired up correctly after testing voltages with a multimeter I decided to turn the game on with the PCB connected. The game was now playing blind I was able to coin up / add credits to the game and I was able to hear the game sounds but unable to see anything because obviously no monitor was in place. So rather than remove another monitor from one of my other games I decided to build a test rig / portable LCD. Sitting in my closet for years was a PSone LCD screen which is able to run CGA resolution if modified. I decided since I wasn't using the PSone LCD screen for anything I decided to break the case open and solder the respective wires. To my delight I was able to see the BurgerTime PCB working properly on the PSone LCD screen !
BurgerTime PCB Working on the PSone LCD CGA Test Rig Monitor
I ended up going on a service call to fix another persons Centipede locally and instead of taking payment I bartered for my arcade skills for parts, to help off set the cost of my restoration I was granted the Stencils for fixing someones Centipede. Fast Forward about 4-6 weeks later I finally received my stencils for the art work on the side of the cabinet to replace Peter Pepper with. The Side Art stencils will come in a large tube with 6 sheets in total. Two for the white, two for red, and finally two for the black stencils. This is probably without a doubt the most tedious part of the entire restoration process but the results speak for themselves and are worth it in the end. My advice is take your time and either dedicate an entire day for this process or even space it out over 2-3 days, so it doesn't become repetitive and overwhelming.
The first color that's applied is "White". When you apply the stencil try to smooth it out as best you can using a squeegee, credit card, soft edge etc.. Once you place the stencil on and finish smoothing it out, you will notice some cut outs that look like Pac-man, don't paint over those and don't remove them as they are markers for the following layers of the other stencils so that the rest of the artwork will line up. Here you can see I also used some painters tape to prevent errors. I happened to of rolled this set instead of spraying I wanted to try an alternative method and I think rolling you have extreme control, the stencil won't lift on you from the air and won't have over spray. I rolled one layer of white, waited about 20min or so and than rolled another coat. You want to try to remove the stencil when it's still slightly tacky, as latex has a tendency to peel.
Next color was the "Red" (*again I added two coats of paint in the photo was one coat) :
The final color was the "Black" This coat was the hardest in terms of removing it because you needed to literally cut out / pick off all of the tiny pieces even the seeds on the hamburger bun, some smaller pieces within the pepper shaker etc:
Once everything was peeled off the end result is well worth the effort. The process is obviously repeated on the other side of the cabinet:
BurgerTime Stencil Kit Completed
At this point in time the cabinet was ready to be moved into my basement, I was done painting, and the cabinet essentially just needed certain parts to be put back together as well as a CRT needed to be installed. The next item I added was new orange T-Molding. The original T-molding over time fades, cracks etc. After I added the T-Molding I installed silk screened kick art. The kick art was made my www.thisoldgame.com, but was sold out at the time so I luckily obtained mine from another KLOV member.
T-molding & Kick Art Applied
Next I needed to add a CRT. I bought a used monitor but I needed to change out the frame. Luckily I had a G07 frame available so it would seamlessly fit without any issues. I also installed a brand new sheet of smoked plexi. I added 2 new wedge lamps in the coin door, along with a new fs2 starter for the marquee and a new florescent lamp. Below is a video of the game play.
Q*Bert was manufactured by Gottlieb which was released in 1982. Gottlieb was predominately a pinball company but made a few video games . The Gottlieb staff had difficulty naming the game, and, aside from the project name "Cubes", it was untitled for most of the development process. The staff agreed the game should be named after the main character, but disagreed on the name. During it's development Q*bert was under the project name Cubes, but was briefly named Snots And Boogers and @!#?@! during development. The game was conceived by Warren Davis and Jeff Lee. Lee designed the titular character based on childhood influences and gave Q*bert a large nose that shoots projectiles. His original idea involved traversing a pyramid to shoot enemies, but Davis removed the shooting game mechanic to simplify game play. A few early test models, however, were produced with @!#?@! as the title on the units' artwork. During a meeting, "Hubert" was suggested, and a staff member thought of combining "Cubes" and "Hubert" into "Cubert". Art director Richard Tracy changed the name to "Q-bert", and the dash was later changed to an asterisk. The game play consists of the levels are designed as pyramids with various colors that you need to change them to in order to advance to the next level. The game also consists of other characters which is known on the back of the flyer as "Who's who, and what's what". You have a green character with glasses known as "Slick", he is no threat to Q*Bert if you touch him you earn points but he changes the cubes he hops on back to their original color. Another character like his brother slick, "Sam" makes Q*Bert's job harder by changing the colors of the cubes he touches. You also have a green dot / ball when Q*Bert touches it the magic ball will freeze the board for a short time enabling Q*Bert to freely hop around to try and complete his task. When a purple ball reaches the bottom it becomes "Coily". This snake villain chases Q*Bert trying to smash him. Other enemies include a "Wrong way" character that travels sideways and will stop Q*Bert if they touch. Another enemy just like wrong way is "Ugg" he travels sideways and is dangerous to touch. Lastly you will notice floating discs around the level, you want to lour the snake / coily to the edge of the pyramid and than hop on a disc this will yield you 500pts as well as trigger the solenoid.
Q*Bert Merchandise
Q*Bert was outside of probably Pac-Man & Donkey Kong one of the most merchandised arcade games. It had it's own short cartoon, lunch boxes, toys, board games, puzzles, books, pencils, watches, house ware items etc.. Q*Bert was a pop culture icon. Soon Q*Bert along with many other gaming icons will be resurrected back to the public in Disney's new movie "Wreck It Ralph". As a side note I'm a big fan of Disney and visit Disney World every so often, I wasn't allowed to check out "Disney Quest" which I was told is essentially my basement. I really wish Disney would drop off a "Fix It Felix Jr" to my house !
Disney's Wreck It Ralph
Disney's Wreck It Ralph
Now for a fairly incredible craigslist story on how I obtained my Q*Bert. This guy for a while posted a Q*Bert on
craigslist at $950.00 obo, out of no where dropped it down to 300.00, I
spoke with him on the phone he claims it's not his game it's his friends
game and his friend had 2 Q*bert's and
was moving to I think he said Carolina..The reason the price was dropped
according to the seller was because when someone went to look at the
game which when they did; they fiddled with it and offered him a
low balling 150.00 for it or so he claimed. Since they left he claims the
games not working, but was working a few days prior. The picture he posted I said
to him, that photo looks like an ebay listing photo in IL, and he's in
NY. After I called him out on that he began to become frazzled even
though the guy claims he posted the photos, he seemed to rush me off the
phone.. I asked him for an address of where the game is located, he said
it's a new road and wanted to meet me at a Chinese restaurant ? I'm
thinking maybe he has a conversion game or whatever and doesn't want to
post photos of the actual machine if one even exists. The guy also
said he had other stuff for sale but I've been there done that drove to
CT once and the guy tried to bait and switch me and some friends and we
didn't bite. And to add to all of this he
gave the "I'm going to burn it and get more satisfaction speech" on the phone. Guy seemed very shady on the phone, I've been in sales for a
long time and if I'm selling something I treat the buyer correctly.
Supposedly the game was located in Armonk Westchester NY. I didn't really
want to drive 2-3hrs for no reason. Being that the photo was wrong, he wanted to meet me at some random Chinese restaurant, and it wasn't exactly around the block from my house. At this point I'm thinking this is a scam and a waste of time, but It was my day off so I figured I would entertain the possibility of it actually being legit.
Well... Several @!#?@! hours later after sitting in traffic... Turns out he was telling the TRUTH!! I finally scored a @!#?@! Q*BERT!
The game looks as though it was HUO (Home Use Only) for what it's worth the game had slightly over 100 total plays. The inside of this thing is pretty immaculate to me
considering it's age Id be willing to bet he had to be the original owner, if not it was hardly used and well maintained.
Inside of Q*Bert
Coin Counter, Service Switch, Volume Controls
The game has
the raised Gottlieb coin door, even saw the Gottlieb card inside to be
mailed away, the knocker all boards even the monitor looks fresh, all
the boards are present and still protected by a large cardboard.This thing looks like it was in a time capsule. It does have CPO
ware, minor chipping on the bottom from being moved around which are
the only issues IMO. The raised Gottlieb coin door is a fairly sought after part that sometimes is not present on the cabinet. Some alternative Q*Bert's had blank doors used mainly with the "Mellow Yellow Q*Berts" which often found their way into 7-11's.
The owners friend made all of these arrangements, so the dude rolls up
in a white dealer plate cargo van.
And I'm like man I'm either getting
kidnapped, rapped, killed all three.. but I decided to follow him to
this house that apparently had an 8 car garage.. I don't even think on
MTV cribs have I witnessed that. So sure enough we pull up to huge
mechanical iron gates with a security pad... and sure enough one of the
biggest houses I've ever seen, dude wasn't lying two 4 car
garages across from each other, guy had a legitimate lift that you would
see in a service bay in one of the garage spots and trust me when I
tell you it wasn't a standard size garage it was massive!!.. in the back
left corner of the 4th bay of this mansion garage lol was low and
behold this sparkling Q*Bert.
Clean Original Q*Bert Monitor Chassis
Q*Bert Rom Chips
Q*Bert Power Supply
I plugged it in, fired it up..nothing it was dead. I didn't even care
considering the condition I was ready to take this thing at 3 beans
regardless, especially after traveling blah blah. I plugged in some
Christmas lights he had laying around in the garage and told him that
likely the people that came prior flipped both the interlock switch as
well as the test switch on the outlet. And wouldn't you know it the Q*Bert fired up like a champ! The monitor was out of synch after making the adjustments it looked great. The PCB's were all incredibly clean.
So was this ad a scam, NOPE! Sometimes
you just gotta @!#?@! go for it! I got really @!#?@!ing lucky. I have been
looking on and off for about 6+ years sometimes if your adventurous and
patient or perhaps lucky enough you will find the game in the condition
and price you want.
While I generally for the most part like to fully restore games this Q*Bert did not really require that much time money or effort to get it working 100% again. Q*Bert wasn't moving on the levels, but I wasn't able to look under the control panel until I got the game home. Most control panels have 2-3 latches, Q*Bert actually has 1 latch slightly off center to the right, and 2 wing nuts holding down the control panel which slides forward / away instead of lifting up or down. Once I was able to take the control panel off I noticed why Q*Bert wasn't moving, a rubber sleeve wasn't touching the micro switches. Being that the inside of the cabinet was clean sure enough I spotted the part that had fallen down on the inside of the cabinet.
I actually ordered a joystick rebuild kit which I didn't install but wanted to have one on hand from www.twistywristarcade.com as well as a new knocker solenoid. The Knocker / Solenoid is a nifty little feature where if you hop on a disc and Coily falls off the pyramid or if Q*Bert falls off you would hear a "Knock" on the inside of the cabinet, As if the character fell on the inside. Gottlieb was a pinball company who dealt with solenoids so they must of had the idea to incorporate it into a video game which really does add a nice novelty element to the game. My original knocker wasn't working so I replaced it, and now it's working great. The knocker requires 30v and can be turned on or off via a dip switch on the PCB.
New Solenoid / Knocker
One problem that Q*Bert's have is the original battery that's installed to the PCB could potentially have a tendency to leak / create battery acid damage. I took an early precaution and just de-soldered it from my board entirely. They battery is used for saving high scores but other methods have been implemented in creating safer ways to do so, for now I just removed my battery.
The marquee light wasn't illuminating so I had some spare FS-2 starters laying around, popped one in, and sure enough the marquee light turned on.
Q*Bert Marquee
The control panel overlay isn't perfect but I don't think I'll be replacing it anytime soon as I believe the CPO still has plenty of years left, I might change my mind though. You will also notice that the joystick is mounted for a diagonal use set up for controlling Q*Bert. After I used a magic eraser the control panel pops a little bit more. Below are pictures before cleaning the control panel.
Article from Computer & Video Games Magazine April 83' Review:
Below is a video of the power up and game play. During power up you will hear the solenoid knock, along with Q*Bert saying "Hello I'm Turned On". Throughout the game play you can hear the solenoid knock as coily falls off the pyramid.


