 Ms. Pac-Man another unmistakable recognizable gaming character at over 30 years old still continues to become staples in peoples video game collections. Although Similar to Pac-Man; In Ms. Pac-Man you have the fruit that jumps around, in addition to 4 ways to pass through and escape the maze as opposed to Pac-man's 2 ways. Ms. Pac-Man In my opinion is also better because you get different mazes after every few screens. I also tracked down this game locally on craigslist. Being that the game is so popular and common most likely on any craigslist you will find some form of a Ms. Pac-Man cabinet. Sometimes you might see multicades, or conversions, cocktails, cabarets (mini), and of course the traditional upright. I was able to track down an original cabinet in fair cosmetic condition but it was in non-working condition. I was happy because I knew that would keep the cost down and I would be able to fix it eventually.
 The first thing I did was tested the Ms. Pac-Man PCB inside my Pac-Man cabinet since it shares the same pinout. I had the RSOD, also known as the Red Screen Of Death. So the guy I bought my original Pac-Man PCB i had sent this one out to be repaired for a very fair price. Although Typically working replacement boards go for around 50-90 shipped. I wanted to keep my original board inside the cabinet since all of my numbers matched.
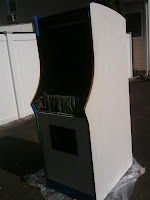
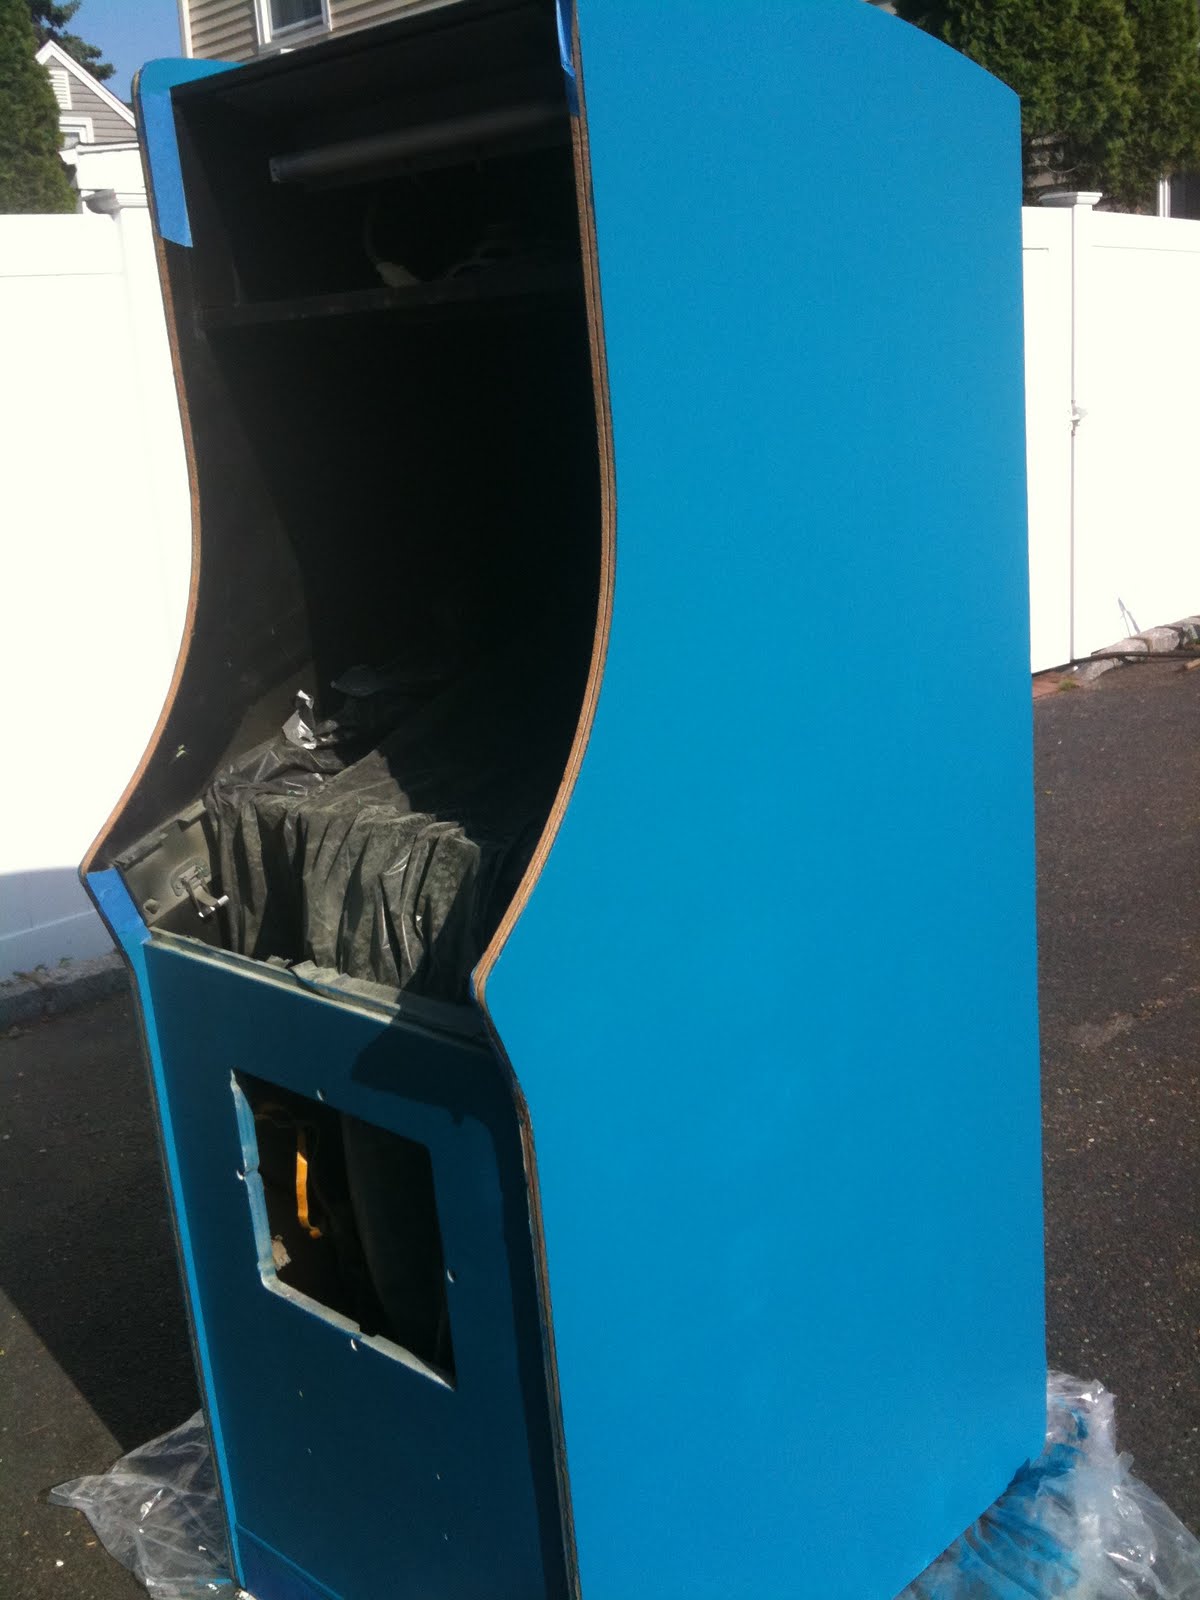
While the board was being sent out although the cabinet was in fair condition, I wanted to sand it down / fix any wood issues / repaint.


The coin door had the typical lock bars installed at some point it was obviously a game that was "on location" earning money. So I used bondo to fill the holes and smooth / sand it down.


Once the cabinet was sanded down I applied primer, and painted the cabinet using the above color code from home depot. Other pictures below showing the painting progress.


Inside the cabinet typically the power supplies go bad after 30 years, or need to be rebuilt. I decided to order a switching power supply conversion kit through arcadeshop.com. Below you can see photo's of the kit installed:


It had an original G-07 monitor inside the cabinet, I noticed a blown fuse, I wasn't sure what the condition was with the monitor so I decided to clean / wash it to get rid of 30 year old crud that had built up around sensitive parts. Temporarily I replaced the monitor with a virtually new burn in free Wells Gardner. Below you can see the before and after pictures of the original G07, down the road I will replace / fix the chasi and possibly re-cap, new flyback fix the original monitor. down the road I'm sure I'll utilize it as the CRT monitors are getting harder to find.
Before and After cleaning the g07 monitor:


So not much was left to do other than slap on some artwork for cosmetics, Also I had replaced the marquee because the original one was majorly faded due to the fact that the marquee sits so close to the bulbs / florescent. Many times the marquee loses the "Pink" and almost turns white. Also I had added Pink T-Molding from T-Molding.com. I kept the original Control Panel Overlay because I couldn't really justify replacing it the condition was good enough. My cabinet has alot of "number matching" parts, my cabinet, pcb, and throughout other various locations on the cabinet has number 51987. Below are some pictures showing the serial number throughout my Ms. Pac-Man cabinet In addition to the Dip Switch Settings:


 My cabinet has alot of "number matching" parts, my cabinet, pcb, and throughout other various locations on the cabinet has number 51987. Below are some pictures showing the serial number throughout my Ms. Pac-Man cabinet In addition to the Dip Switch Settings:


I found a great deal on a burn in free CRT Wells Gardner which when I installed noticed an error with scrambled lines saying "Over Range". I Googled and came up with a .pdf fix from Wells Gardner claiming to hit the OSD button on the remote board and lower the contrast / brightness which should fix the issue. The only major problem I noticed was that my remote board didn't seem to function with the "Over Range" error on the monitor. So I asked the seller what the cause was. He said to cut the middle wire on the three prong sync molex. I felt like Macgyver and wanted to make sure I wasn't going to cause any further damage. Reluctantly I ended up saying oh well and just cut it, sure enough that fixed the "Over Range" Issue and the Wells Gardner Monitor looked fantastic ! Finally the game wasn't playing blind and looked great.


Above you can see that Pac-Man and Ms. Pac-Man were meant to be together! Below is a video of the game running. While recording I got a blue maze to start level one which doesn't happen that often. After the death of Ms. Pac-Man towards the very end of the video you can see the maze change back to it's more common / traditional color for level one.
However according to Don Hodges:
"The origin of this bug is in the original Pac-Man code. There is a subroutine which controls the flashing energizers in the attract mode of Pac-Man. Normally, this subroutine is only supposed to run during the introduction screen where the ghosts are introduced by name. On some occasions, when the player dies, this subroutine gets called, which flashes the 2 screen location where these energizers are located. When it is called in Pac-Man, it causes the disappearance of the dot that is 2 to the left of the starting point of Pac-Man in the maze. The other screen location that is affected is already blank, so the changed color has no visible effect there. In Ms. Pac-Man, it causes 2 screen locations to change color, which affects the different mazes in slightly different ways. For the first maze, this same dot to the left of where Ms. Pac-Man begins changes color to pink. Like in Pac-Man, the other screen location that is affected is already blank, so the changed color has no visible effect there. For the second maze, two locations are affected. For the third maze, only one location is visibly affected. For the fourth maze, two locations are affected. In any case, this bug is very difficult to spot because usually the anomalies are covered up by a screen refresh almost immediately after they are created. The exception to this rule is during the demo mode of Ms. Pac-Man. If you watch the demo long enough, eventually you will notice that the dot in question is colored pink on rare occasions after Ms. Pac-Man has died during the demo, and it stays pink on screen long enough to be easily observed."
***Adding to this post: I noticed during game play that the game seemed rather difficult. The Ghosts were not staying blue for that long. I was able to compare this against my MAME machine and my suspicions were correct. No dip switch settings on the actual PCB existed to change the difficulty or the ghost timing so after more research I was able to come up with a solution. Basically "There are 2 small solder pads near the DIP switch bank, right
next to it is resistor pack RM6, the 2 pads are located just past the
end of RM1 (by DIP switch  see if they are jumpered". Below is a picture of my board set and the cause of making the game more difficult or rather the ghosts changing quickly from blue back to normal. You can see the glob of solder right above RM6 (above and slightly to the right of dip switch bank), after I De-soldered that glob my game was playing as it should! hopefully this helps anyone else who thinks that their Ms. Pacman PCB seems like the ghosts are changing back too fast.
see if they are jumpered". Below is a picture of my board set and the cause of making the game more difficult or rather the ghosts changing quickly from blue back to normal. You can see the glob of solder right above RM6 (above and slightly to the right of dip switch bank), after I De-soldered that glob my game was playing as it should! hopefully this helps anyone else who thinks that their Ms. Pacman PCB seems like the ghosts are changing back too fast. 


